Pipeline is here! Last night our engineering team migrated the brand-new Pipeline feature to LoanPASS!
Starting today, Admin users will be able to configure their very own custom loan pipeline to track all of your pricing requests.
Here’s how to get started…
- Configuring Your Pipeline
In the LoanPASS menu select Field Library:

Then select Pipeline Settings:

In the Pipeline Settings page are all of the options for configuring a Pipeline. You can create new custom fields and you can also select existing fields from the Application Form or Product Specifications page, you can even include Calculations such as Adjusted Interest Rate and Adjusted Price in your Pipeline:

Here’s an example Pipeline configuration using fields from each category:

Once you’ve saved your Pipeline Settings, you can begin creating pipeline records!
- Creating Pipeline Records
In the Price A Loan page, select the Start Or Continue Borrower Pipeline Record button:

Click the Create Pipeline Record button. (The Lookup Loan field is used to search for existing Pipeline Records) :

Now you will notice the 3 custom pipeline-specific fields that were created for Loan Number, Name, and Property Address are displayed. Enter the applicable data and click Create:

Once the Application Form fields have been populated and a rate & price for a desired product is selected, click the Add Scenario button:
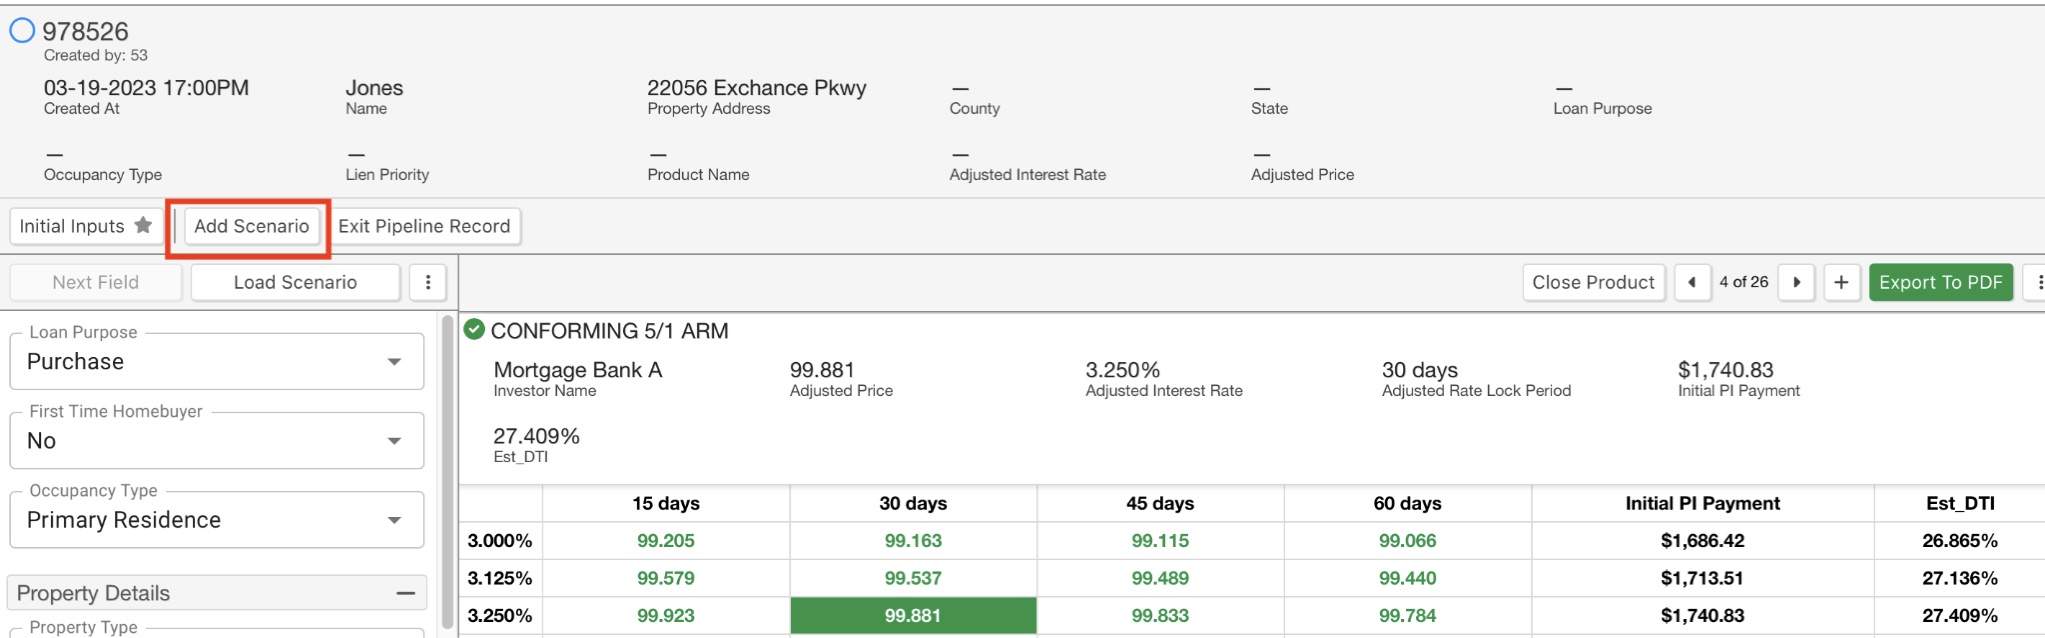
A field will then display so you can name the scenario, as well as a checkbox to make the scenario preferred, a Cancel button, and a Save Scenario button:

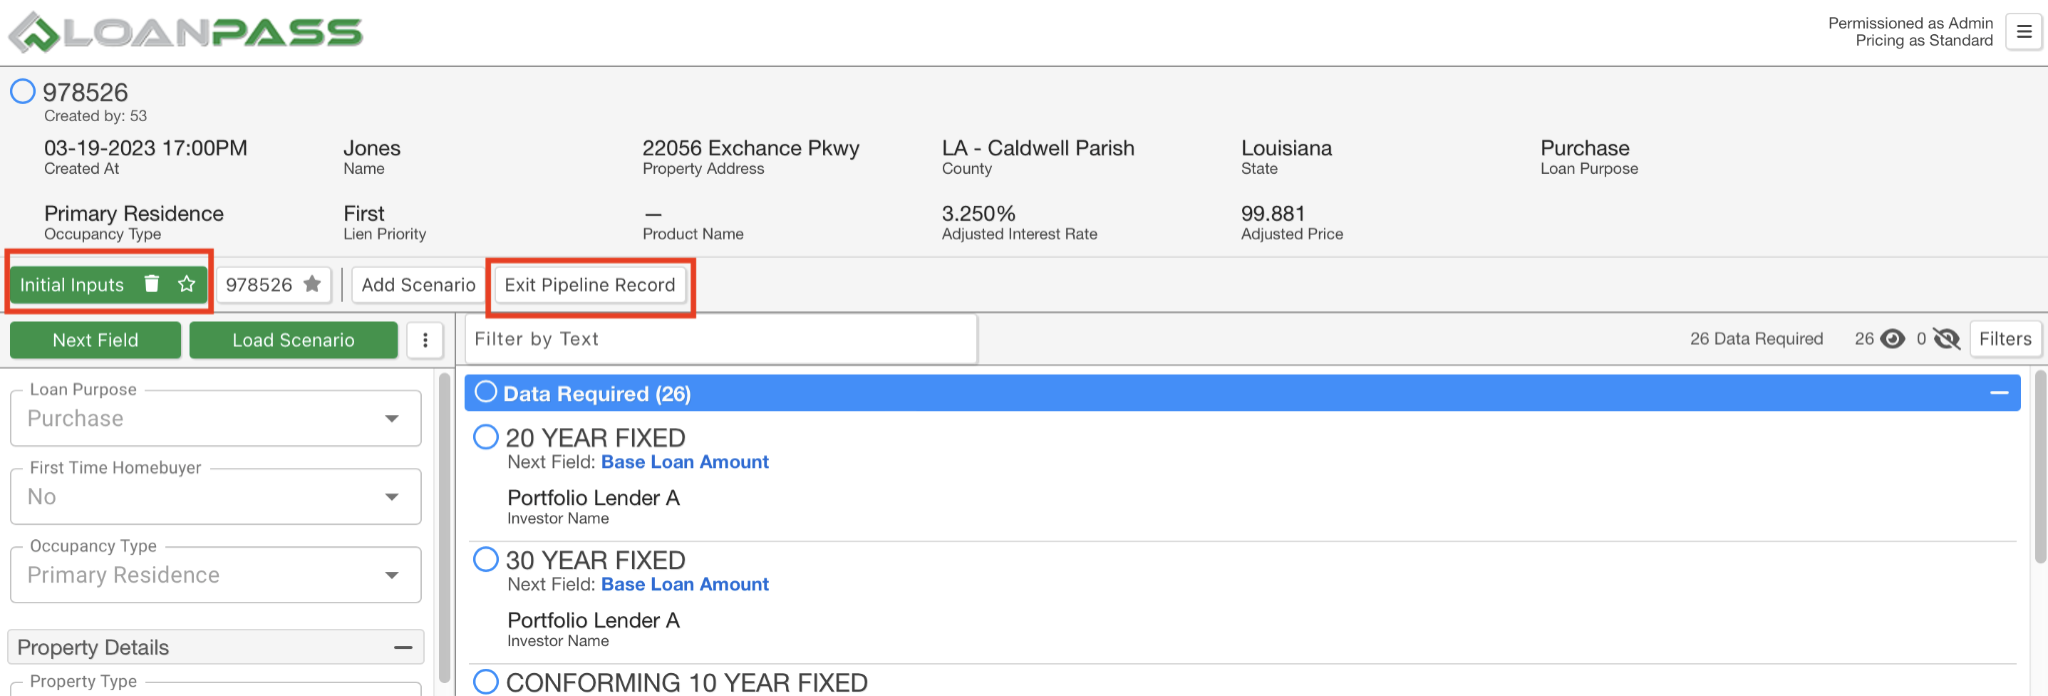
After saving your scenario,you then have the option of clicking the Initial Inputs button to clear out the scenario and search for other products for this Pipeline Record, or you can click Exit Pipeline Record to return to the Price A Loan page:
- Viewing your Pipeline
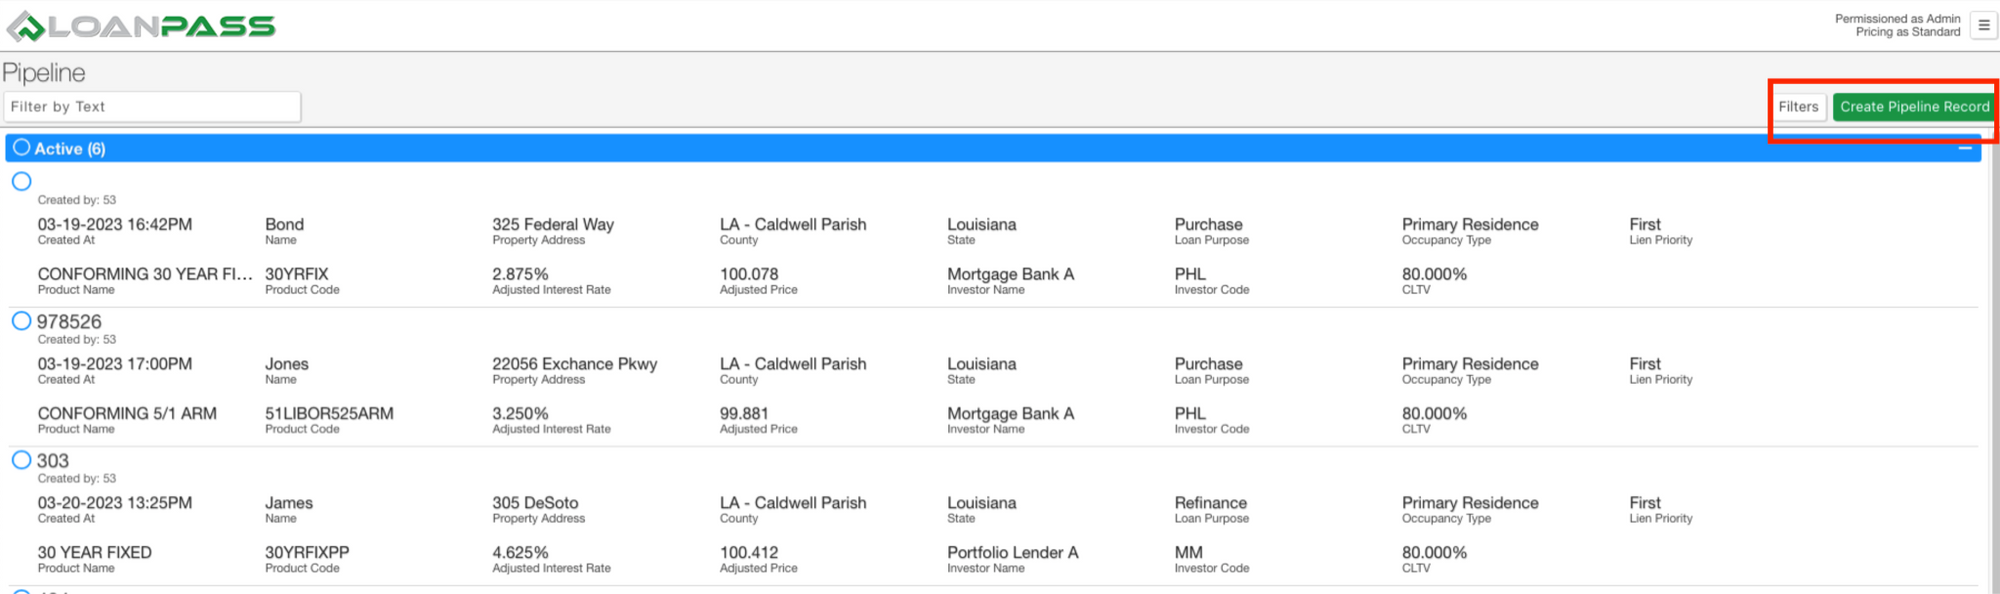
Now that your pipeline configuration is complete, you can access all of your Pipeline Records:

On the right side of the screen there are two buttons, one for adding filters to your Pipeline and one for creating new Pipeline Records directly from your pipeline:
The filters feature allows you to filter your pipeline using the fields and calculations that were used to configure your pipeline:
- Pipeline Permissions
Admin users will need to visit the Roles page to determine what level of permissions to give each different user role.
The options to consider are:
- Pipeline Menu Access - Are there any users that don’t need to access the pipeline?
- Pipeline Records Delete Own - Do you want the user to be able to delete their own records?
- Pipeline Records View All - Should this user be able to view other user’s records?
- Pipeline Records Delete All - Should this user have the ability to delete other user’s records?
- Pipeline Records Edit All - Do you want the user to edit other user’s records?
